It is the 1521st of March 2020 (aka the 29th of April 2024)
You are 18.116.51.117,
pleased to meet you!
mailto:blog-at-heyrick-dot-eu
A fuzzy logic rice maker
I already have a rice maker. It's one of those metal-bowl-with-a-glass-lid models with two settings - on or off. While it did a reasonable job of cooking my koshihikari rice (gloopy sushi style), its simplicity was also its biggest problem. The element would provide heat. It would heat, and heat, and heat, and in the bowl the rice would boil. Steam (and often bubbles and stuff) would pour out of the thing which meant it pretty much had to be used outside. The mechanism of how it works is quite clever - when all the water has boiled away, the temperature of the bowl will rise (above boiling). This will activate a thermostat, which will activate a magnet, to trip a solenoid, to clunk the machine into its lesser "keep it warm" setting.
The problem here is the part where the temperature rises. It isn't immediate, because it also has to heat up the rice at the bottom. You can see where this is going, right?
Burnt rice. And since it's sticky rice and not Uncle Bens, it's a bit of a mess to clean up.
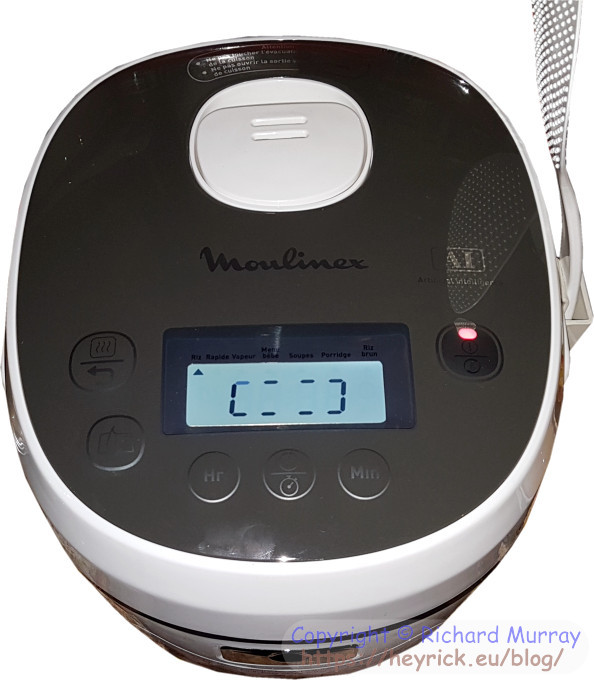
Enter the first vide grenier of the season. A Moulinex "multicuiseur" which turns out to be a 9-in-1 rice cooker. It had only recently been purchased, for about eighty euros. Never been used. Mine for €25. This is a "Japanese style" rice cooker. By that I mean it's an enclosed space with a lid that clips down and a bunch of buttons on the top. It's not Japanese enough to serenade me with music when I plug it in, but it's a far more serious rice maker than the heated bowl.
Granted, the metal bowl of this particular model is quite small (it 'feels' like half the size of the one in my dumb rice maker), but that's okay. It's mom and myself, and of the rice (one measure) that I cooked for myself, the machine is capable of four times that. So it's big enough for us.
I put in some organic triplet rice (long grain, red, and wild). The packet said one measure rice to five measures of water. So I put this into the rice maker (after washing the rice - I remember the catastrophe of the previous rice maker when I didn't know to do that), and set it going.
I could hear it clicking on and off. After a long time (about 40 minutes), it beeped and entered its final phase with a fifteen minute countdown.
Afterwards... My rice was ready.
Only... it wasn't, exactly.
Don't get me wrong here, the rice was really nicely done. It was just floating in loads of water. Well, okay, this rice cooker uses some sort of steam shield and (mild) pressure seal to cook. So I will have to recalculate how much water I need, given that the primary purpose of the water is to be absorbed by the rice, not mostly boiled off as was the case with the simple rice maker.
It wasn't a disaster, I strained the rice, added some creamy shallot sauce (I'm being posh!) and have only just finished eating it. One small measure of rice filled my bowl, and as I said above, the device can make four times that.
Having looked in the instruction manual (perhaps something I should have done first!), the basic method appears to be to match cups of rice to cup-level indicators etched into the cooking bowl. I'll try this next time and I rather expect the results will be far better, however I think this is perhaps a bit overly simplistic - different types of rice will require different amounts of water. Consider sushi rice (the gloopy stuff) versus something like basmati. I think what it'll come down to is some experimentation to know what works best in this particular rice maker.
For example, my gloopy rice is always from Japan and grown in a paddy. In my previous rice maker, it was a simple measure of "one cup of rice to two cups water, then throw in another glug of water just because". Excepting the burnt bits at the bottom, this made perfectly serviceable rice.
I tried Italian and Californian Koshihikara, but these are dry-grown, not in flooded paddies, and as such have a different texture and different cooking requirements. Plus, let's face it, the Japanese stuff just tastes better. I don't think the important thing is that it was actually from Japan, more that it was grown properly - in a paddy, like how it's supposed to be done. Which, yes, probably implies a wet and humid environment, to give a completely different result from the same type of rice.
Now the fuzzy logic is evident by the amount of water left behind. Why didn't the machine know? It's a reasonable question, and one answered by realising that the machine attempts to cook more like a human.
The simple rice cooker just "adds heat" and to hell with the consequences. It will cook rice, but sometimes I wonder if that's merely a collateral effect of "making a mess" which is really the primary objective of the thing.
The fuzzy logic rice cooker doesn't just throw out heat and hope for the best. It brings the water (from cold) up to temperature, it then regulates that temperature by applying heat as and when necessary. You see, the fuzzy logic rice maker doesn't care about the rice being cooked or not cooked, it wants the rice to be cooked correctly. This is why it didn't know that there was a lot of water left behind. It wasn't trying to incinerate the rice, and it wasn't trying to overcook it either. It told me that it had carefully cooked my rice and my rice was done. That it was still floating in water was my own stupid fault for not reading the instructions. And I rather suspect that had the machine been asked, that would have been its reply, literally word for word.
I should, perhaps, try the "brown rice" setting for the next time as well. This will use a slightly lower temperature for a longer time, in order that the brown rice (the wild rice, in my case) cook through without risking going mushy.
Mom wants to try making tapioca. Using almond milk as she can't handle lactose. There's a porridge setting, which takes a lot longer, but presumably is careful not to overheat the milk (most of us know what milk does when it reaches its boiling point, and it isn't pretty). Suddenly, this little fuzzy logic device is not only the smartest thing in the kitchen (and that's including when I am in the kitchen!), it's also starting to show some rather interesting versatility.
It's only a rice maker, it isn't a Cookeo™ or one of the fancy billion-in-one gadgets, however I put "It's only a rice maker" in italics because a bit of ingenuity and realising that it is actually capable of a lot more simply by heating and boiling water, and one can start to see that there's more potential than just making perfect rice.
Should I mention there's a soup setting? And that it can steam fish, meat, and veg with a drop-in tray?
One of the reasons I eat so much junk (prepared meals) is because I just can't justify taking two hours to create a meal I'll eat in under twenty minutes. I just don't have the time for that.
Maybe, just maybe, the wind of change started to blow when I opened the lid and looked at my nice-but-soggy rice?
Watching TV without a computer
I do not have a TV. Well, I do. It's an ancient cathode ray model from the early '80s that has a habit of frizzing out on me (leaving a bright white line across the screen until I thump it in just the right place). I've not used it in years. Now I watch my TV on the computer monitor. But, alas, while this is a simple thing to do with a USB video capture device, it does mean having a computer working in order to watch TV... quite some power consumption.
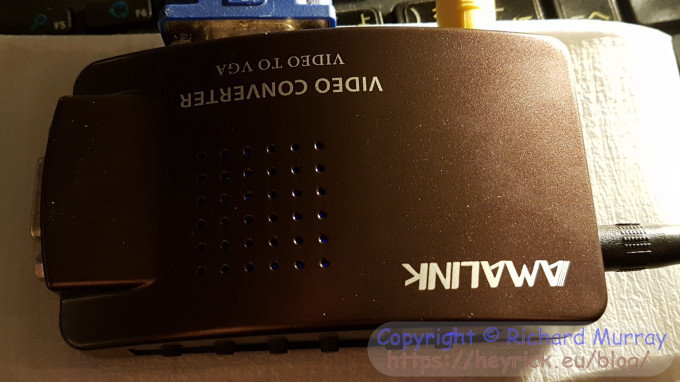
Enter this little gizmo I got from Amazon for... I think it was about €15 all in:
It accepts analogue VGA, S-video, and composite video. It outputs to analogue VGA. In short, it converts analogue television signals (PAL or NTSC) into something that can be watched on a traditional monitor.
There are six buttons:
Zoom - selects the aspect ratio (4:3, 16:9, 16:10, Full). This means it perfectly copes with displaying an anamorphic (stretched for widescreen) video signal, and it also has a concept of the ratio of the monitor. My 1280×1024 monitor is sort of square so there are big black bars above and below the picture. The same thing on my 1440×900 monitor (sort of widescreen) has very small black bars.
Input - toggle the inputs (composite, S-video, VGA).
Mode - toggle the picture mode (Soft, Normal, Bright, User).
Menu - change Brightness, Contrast, Saturation, Hue, and Language. Use +/- keys to alter settings.
PIP/- - if a VGA signal is coming in from a computer, PIP will switch to overlay the video frame on top of the computer display. Some of the other keys (I don't remember which, sorry) can be used to select which corner, or middle, the video appears; and also to step through three different sizes. The picture-in-picture setting does not respect the configured aspect ratio. It's maybe useful to have, but if you're used to widescreen...
P.P/+ - this selects the output resolution (800×600 at 60 or 75Hz, 1024×768 at 60 or 75Hz, 1280×768 at 60Hz, 1280×1024 at 60 or 75Hz, 1400×1050 at 60Hz, 1440×900 at 60Hz, 1600×1200 at 60Hz, 1680×1050 at 60Hz, 1920×1080 at 60Hz, and 1920×1200 at 60Hz).
Running it on my Pi's monitor (1280×1024), the colours were more vibrant and the motion more fluid at 75Hz. This may be due to issues regarding translating a 50Hz source to a 60Hz output. I would imagine for people with NTSC video, the 60Hz options would be better? I found the video at the smaller size options (800×600 and 1024×768) had a tendency to go weird (bright blue) for about thirty seconds, like maybe the device was misinterpreting the video as NTSC or something? It would lock into the colour, and then a little later mess it up. I also noticed 800×600 was jerky with the motion.
Selecting the correct size for my monitor worked well, the problems all went away. But, then, this is probably a good idea anyway as the correct monitor size allows you to set the aspect ratio properly.
Don't be surprised if you see some patterning and artefacts on the screen. The video convertor box (in the correct display size) actually does a rather impressive job of smoothing out the video so it looks good on the screen, but just remember that the input is 720×576 (PAL) or 720×480 (NTSC). That it takes a standard video image and makes it look almost HD is smoke and mirrors.
Here is a photo of a live broadcast (BBC News 24) as it appeared on my PC's (1440×900) monitor:
I found an old male-to-male VGA lead and tried the picture in picture function. It was... poor. The computer display was washed out and fuzzy, though the inserted video didn't look bad. I wonder if this is a fault of the box, or if it was a bad quality video lead? I have purchased another from Amazon, so I'll let you know when I try it.
The convertor runs off a 5V supply, the power lead being a USB plug at one end and a barrel plug at the other. My meter notes it as claiming around 300mA in use, so pretty much any phone charger with a USB socket on it ought to be fine. It comes with a USB lead, but not a power supply.
It also comes with a short composite video lead and... a dual-phono to 3.5mm audio convertor. Crap! I didn't notice this earlier so I bought one off Amazon. Oh well, it's an unusual sort of connector so it'll be useful to have a spare. You see, the convertor box doesn't touch audio at all. So this little gizmo allows one to put the two phono plugs into one end, and plug a pair of headphones (or computer speakers) into the other end. Whether or not this works depends upon the source. Technically plugging line level audio into headphones is a really bad idea, however many devices have volume controls. I've never needed to use the volume controls on my satellite receiver...until now.
As I write this, I'm watching NHK World on my Pi's monitor, listening using the headphones. Even if the picture-in-picture function doesn't work, it creates a good looking picture on my monitor and that's exactly what I was looking for.
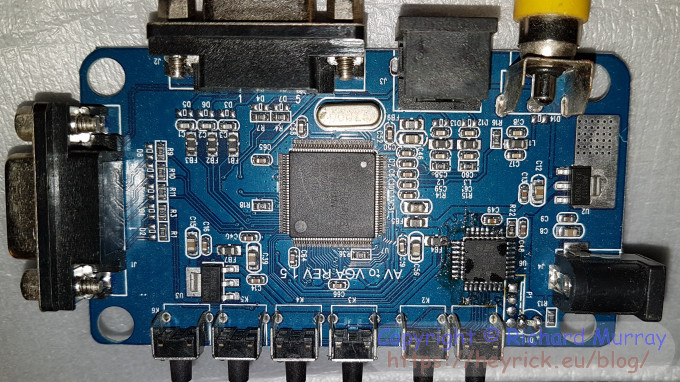
And, yup. Since this is Rick's blog, here's some geek-porn:
The big chip appears to be labelled: HW175-LQFP128 OE-MAP11N U5NOPTS 80R-1625. I have not found any information on this yet.
The smaller chip has some sort of black paint on it, obscuring it's markings.
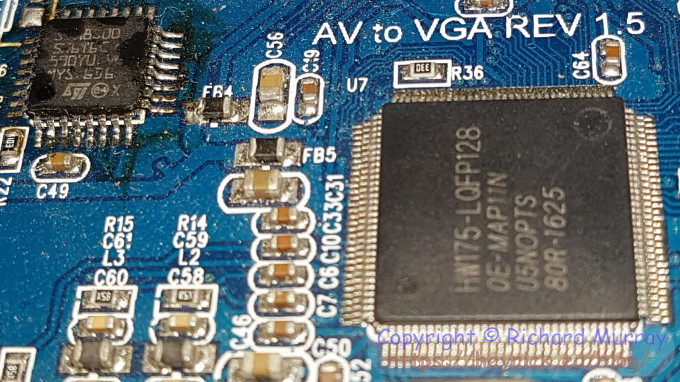
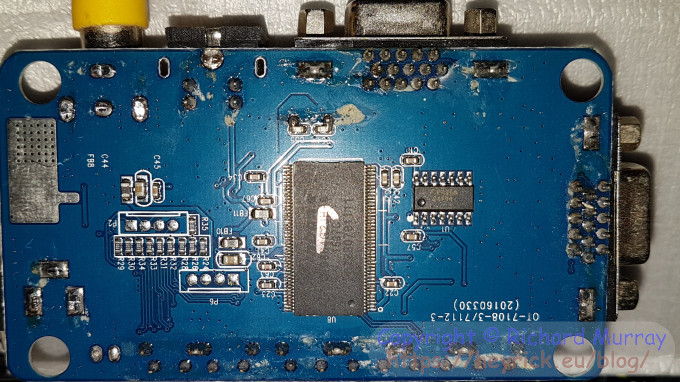
If you want to have a go, here's a close-up showing the IC markings:
Here's the other side. I couldn't completely read the chip reference, but the parts I could see looked like a memory IC. This is probably memory to be used as a framebuffer for assembling the output video frame.
Your comments:
Please note that while I check this page every so often, I am not able to control what users write; therefore I disclaim all liability for unpleasant and/or infringing and/or defamatory material. Undesired content will be removed as soon as it is noticed. By leaving a comment, you agree not to post material that is illegal or in bad taste, and you should be aware that the time and your IP address are both recorded, should it be necessary to find out who you are. Oh, and don't bother trying to inline HTML. I'm not that stupid! ☺ ADDING COMMENTS DOES NOT WORK IF READING TRANSLATED VERSIONS.
You can now follow comment additions with the comment RSS feed. This is distinct from the b.log RSS feed, so you can subscribe to one or both as you wish.
This web page is licenced for your personal, private, non-commercial use only. No automated processing by advertising systems is permitted.
RIPA notice: No consent is given for interception of page transmission.