It is the 1511th of March 2020 (aka the 19th of April 2024)
You are 52.14.8.34,
pleased to meet you!
mailto:blog-at-heyrick-dot-eu
BBC BASIC goes multitasking - a better way
Templates?
First up, grab a copy of the Utils package from the DrWimp distribution - save the contents of this link. Unpack it on RISC OS.
If you are using a RaspberryPi and have installed RISC OS from an SD image, you will find Doctor Wimp already installed for you at - you can find the Template editors at $.Programming.DrWimp.Utils.
Contained within are two Template editors - TemplEd and WinEd. My preferred is TemplEd, but either are much much better than Acorn's icky FormEd (it is so naff, the modern DDE doesn't even bother to distribute it!).
You may also be interested in looking at Doctor Wimp. It is a library, resources, and tutorials aimed at making it simple to write a proper multitasking application in BASIC. Once you have played with the code that I present for you today, I strongly recommend that you give Doctor Wimp consideration for more advanced projects.
Designing a template
Start !TemplEd and then click on its icon bar icon.
Two windows will open.
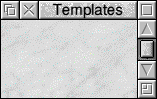
On the upper left, the window browser. It is initially empty, but when window definitions are created, they will appear in here.
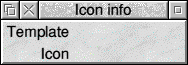
On the upper right, window/icon information. As the mouse passes over icons, information on them will be shown here. You can click on the toggle size icon (the square to the right of the title bar) to display additional information including the size and position of the icon.
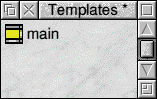
Click Menu (middle mouse button) over the window browser. Follow the arrow to the right of the Create option, and in the writeable icon that appears, type the name of the window. This is our main window, so we shall call it "main". Type main and then press Return.
The window browser will now look like this:
The yellowish highlight to the window icon indicates that the window is visible on-screen.
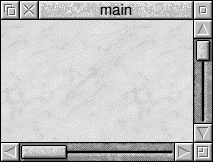
Indeed it is. Near the centre of the screen is a new blank window:
Drag the resize icon (lower right) to make the window a bit larger. We can shrink it down to the desired size later.
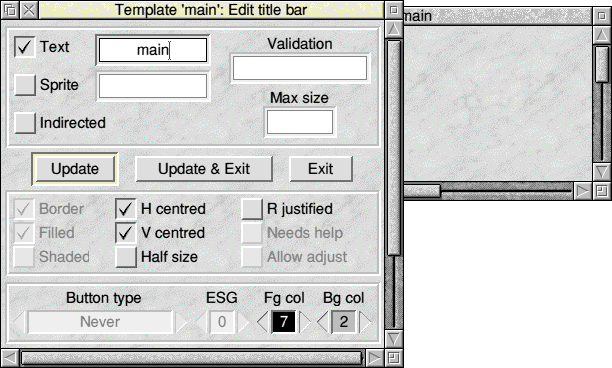
Then double-click on the window's title bar.
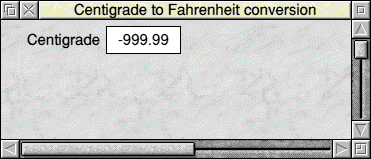
We are going to give the window a better title than "main", so delete the word "main" from the icon (it'll open with the text cursor in the right place for us) and enter "Centigrade to Fahrenheit conversion" instead. Then click on Update & Exit.
Just to clarify - the main window is still called main. We've just changed its visible title.
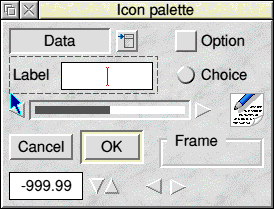
Now click Menu in the window we're editing, and choose the Create icon... option. This will open the Icon palette:
The palette provides default choices for a variety of different icon types.
Try to "draw a box" (click-drag) around the Label icon, and the bigger white one to its right, like this:
Let go of the mouse button, and both icons should appear sort of inverted (a white background for the label, and a black one for the writeable).
The next step is a little more complex. Hold down Shift and then drag the label icon from the palette window over to the main window that we are editing. You should see the icons appear in the main window.
Don't try to drag from the writeable icon. This responds to clicks and such, so the result may be...unexpected.
Click the writeable icon (in the main window) and press the right arrow to move the icon to the right a ways (hold down Shift for larger steps).
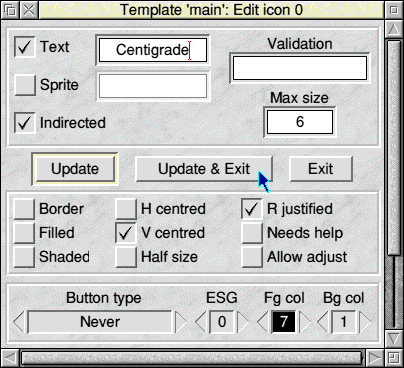
Now double-click on the label icon to edit its properties.
Set the text to "Centigrade" and tick R Justified. Then Update/Exit.
You will see that the text does not fit in the icon. So we need to make the icon bigger. Move the pointer to the right side of the icon and then hold down the right mouse button. After a moment, the pointer will indicate that you can now resize the icon by dragging that edge. If you have the icon information window open to display the co-ordinates, resize the icon until it is 200×44.
Then click on the icon and use the cursor keys to move it to the position -18, 6, 206, -62. You'll see what I mean as it moves.
Now resize the writeable icon (from either the left or the right) until its size is 150×56. Then alter it's position until it is lined up with the label, at position -12, 210, 360, -68.
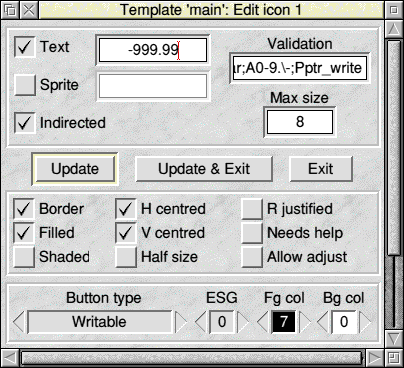
The next step is to prepare the writeable icon. Double-click on it to access the properties, and then set the Text to "-999.99", the max size to 8, and the validation to exactly "A0-9.\-;Kant;Pptr_write". Then Update/Exit.
As I explained yesterday, the A0-9.\- permits only numbers, a full stop, and a minus sign to be entered. The Kant controls the arrows (up/down), Tab behaviour, and to notify the application of all keypresses. Finally, Pptr_write instructs the Wimp to change the mouse pointer to "ptr_write", which is a caret shaped icon, to indicate that this icon accepts typed input.
The main window should look like this:
Here comes some magic. We want to repeat all of the above to set up an icon pair for Fahrenheit. You have two choices. Either rewind and repeat all of that, or carry on reading...
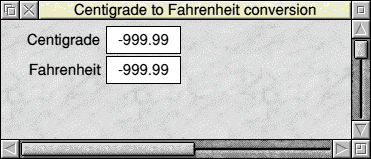
Drag a box around the Centigrade label and its associated writeable icon. When they are both highlighted, press Ctrl D to make a copy downwards (in other words, underneath). Then press the Down cursor twice to leave a little bit of space between the sets of icons.
There. That was simple. All that remains to be done is to change the Centigrade text to say Fahrenheit instead. So call up the properties and do that.
The final icon that we require is the Quit button.
Hold down Shift and then click-drag (in one motion) the Cancel button in the palette. Place this to the right of the Fahrenheit writeable.
The default size is okay, so change the text to say "Quit", and then nudge its position to -76, 390, 518, -128.
The last thing we need to do is to resize the window. Double-click in the window, anywhere that is not part of an icon, to open the window properties. Untick the Back icon, then Update/Exit.
Click Menu over the window and follow the arrow to the right of the Work area entry. Set the window's size (the middle part) to be 530×140. OK that, and the window will shrink to the desired size. Call up the window properties again and untick Toggle, V Scroll, Adjust, and H Scroll. Click Update & Exit one last time.
In the window browser, click Menu, go down to Save, and then call the file "Templates" and put it in the same place as you put the program code yesterday.
Now on with the coding!
Make a copy of yesterday's code. Call it "code2" or something.
Change the memory allocation, from:
DIM wimp% 400 : REM 256 for Wimp blocks, but need more for window def.
to:
DIM wimp% 399 : REM 256 for Wimp blocks, but need more for window def.
DIM icon% 399
This is because the Wimp needs a buffer for loading the window definition and somewhere to put the indirected icon data.
We also change to 399 instead of 400 as this is how you correctly request 400 bytes. BASIC counts from zero, remember, to the request for 400 would actually have allocated 404 bytes.
With glee and extreme prejudice, delete everything between the call to Wimp_Initialise and Wimp_CreateWindow. All that data bodging malarkey? Nuke it. Nuke it all.
Replace it with this:
REM Now get the Wimp to create this window
SYS "Wimp_OpenTemplate",, "<CtoF$Dir>.Templates"
SYS "Wimp_LoadTemplate",, wimp%, icon%, (icon%+400), -1, "main", 0
SYS "Wimp_CreateWindow",, wimp% TO win%
SYS "Wimp_CloseTemplate"
There. Isn't that much simpler than what we did yesterday?
RISC OS works by considering directories prefixed with an '!' to be applications. Upon running the application (double-clicking on it), RISC OS will run the !Run file, which should set up some environment and then run the program proper. As such, we no longer need to worry about programs having bits and pieces of resources lying around. These can all be hidden within the application directory, and the whole lot considered "a program".
As such, go to the top of the program. That stuff about the memory allocation? Get rid of it. It is the job of the !Run file to tell the Wimp how much memory your application requires.
Thing is, if the user wants to enter some data now, they must click the window. This is lame. Let's fix that.
Following on from the above, add this:
SYS "Wimp_SetCaretPosition", win%, 1, 0, 0, -1, 1
This sets the caret in the upper writeable icon, after the first character. We know there is exactly one character (the '0') as we just put it there.
Now go to where the conversions are made, and replace the two bits of code to write and update the other icon each with a call to PROCSetIconText.
You may have noticed that pressing F12 (or ^F12) in our application does nothing. This is not good behaviour, we should kick the hotkeys back to the Wimp in case anything else can act upon them.
Go to the CASE clause for the key pressed event, and just prior to examining wimp%!0 = win%, insert the following line:
IF (wimp%!24 > 255) THEN SYS "Wimp_ProcessKey", wimp%!24
The function keys (and such) are given codes with bit eight set so they can be distinguished from, for example, Alt-keypresses for high-bit ASCII (accented characters and the like). So we're just passing on every key code greater than 255.
Remember I said the Wimp makes a copy of the window data? Well, it is good form to tidy up after ourselves. Insert the following just before the call to Wimp_CloseDown:
wimp%!0 = win%
SYS "Wimp_DeleteWindow",, wimp%
The last code modification is to fix something annoying. What is 36°C in F? The answer? "96.7999". Stupidly overprecise, don't you think?
Insert the following right at the top after the first REMs but before initialising as a Wimp task:
REM Set precision level
oldat% = @%
@% = "+G0.7"
This sets the "general" format (not exponent, not fixed point), with a field width of zero and up to seven digits to be printed. The + means that this also applies to STR$.
Notice that we saved the initial value in oldat%, so go to the Wimp_CloseDown call and between it and the END statement, insert this:
@% = oldat%
While we're here... did you remember there is a second exit point? It's in the PROCWimpError function. If you have not already done so, add the call to Wimp_DeleteWindow and the code to restore @% here too.
Making it an 'app'
We can't run our program yet. If we try, it'll say "Filename '.Templates' not recognised at line ###".
So we must now create an "app" style setup for our program.
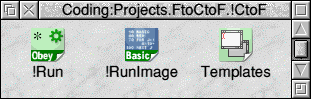
Create a new directory. Call it "!CtoF".
Open the directory by double-clicking it while holding Shift.
Copy the Templates file into here.
Copy also the modified program code. Rename it as "!RunImage". You don't have to rename it, but you should, as it is convention that all programs are called that.
Now create the following file in your editor:
Set CtoF$Dir <Obey$Dir>
WimpSlot -min 24K -max 24K
Run <CtoF$Dir>.!RunImage
Save this file as "!Run" into the new directory, and then set its filetype to be Obey.
What the Obey file does:
Set CtoF$Dir <Obey$Dir>
While Obey files are essentially lists of *commands, the difference between Obey and others such as Exec is that Obey files set a pseudo variable "<Obey$Dir>" that points to the directory that the Obey file is in. As such, you can easily set system variables pointing to your application by assigning them the value of Obey$Dir.
WimpSlot -min 24K -max 24K
We tell the Wimp that we want 24K of memory. While the page size was....complicated....on older machines, everything from the RiscPC onwards uses a "page size" of 4KiB. This means that you can specify your desired amount of memory with a granularity of 4 kilobytes.
Run <CtoF$Dir>.!RunImage
This then, using our custom system variable to provide the path, runs the BASIC program.
That's it.
While there are more things normally required in an application (some sprites for the app's icon, for instance), this is the minimum required to get an application going.
Where to go from here
What I aimed to demonstrate with these two programs was firstly how a single stand-alone piece of BASIC can exist within the multitasking Wimp environment. That was the purpose of the first program, as scary as it was.
We then refined this to work a little better, and using some external resources, to work a little lot simpler.
You can do better.
You can use a library. Akin to their counterparts in C, library functions are prewritten pieces of code that slot in to make complicated stuff easier. Let's face it, the Wimp provides an API that makes the most sense to assembler programmers and its use in BASIC is a huge pile of faffing around with memory and pointers to things. But, wait, why? Why should you? Everybody who programmed the Wimp "back in the day" has their own library of routines to get stuff done. I have my own, based upon a program called "WimpEd", but I'm not going to share any of that - it is quite out of date as I code in C nowadays.
Instead, I will point you at the go-to resource. Unlike my code, this one comes with tutorials and help and all sorts.
If you are using a RaspberryPi and have installed RISC OS from an SD image, you will find Doctor Wimp already installed for you at$.Programming.DrWimp.
There are many things that you can do with BASIC on RISC OS. It will never beat the raw power of writing programs in C, though this doesn't mean that it is useless. Think back to TemplEd, that you used to create the Templates file.
That's written in BASIC. Don't take my word for it, open the directory (hold Shift, remember!) and take a look.
Do you have Dave Higton's MTP program to allow you to connect your mobile phone (etc) to RISC OS? More BASIC.
Here's the mind-bending one. PhotoDesk - the RISC OS answer to PhotoShop. It is written in a mixture of BASIC and assembler.
And, finally, perhaps the largest BASIC program I've ever written. My RISC OS teletext software. A full UI pointy-clicky teletext product that communicates with a EuroCCT style teletext receiver and includes a script interpreter for ease of extracting data from teletext.
It's a bit pointless now, since most broadcasters no longer offer or support teletext, which is why the program hasn't been touched in nearly 16 years. Here's the source code, and here's the assembler source to the helper module, in case you're interested.
Please note that while I check this page every so often, I am not able to control what users write; therefore I disclaim all liability for unpleasant and/or infringing and/or defamatory material. Undesired content will be removed as soon as it is noticed. By leaving a comment, you agree not to post material that is illegal or in bad taste, and you should be aware that the time and your IP address are both recorded, should it be necessary to find out who you are. Oh, and don't bother trying to inline HTML. I'm not that stupid! ☺ ADDING COMMENTS DOES NOT WORK IF READING TRANSLATED VERSIONS.
You can now follow comment additions with the comment RSS feed. This is distinct from the b.log RSS feed, so you can subscribe to one or both as you wish.
This web page is licenced for your personal, private, non-commercial use only. No automated processing by advertising systems is permitted.
RIPA notice: No consent is given for interception of page transmission.