It is the 1517th of March 2020 (aka the 25th of April 2024)
You are 3.142.197.198,
pleased to meet you!
mailto:blog-at-heyrick-dot-eu
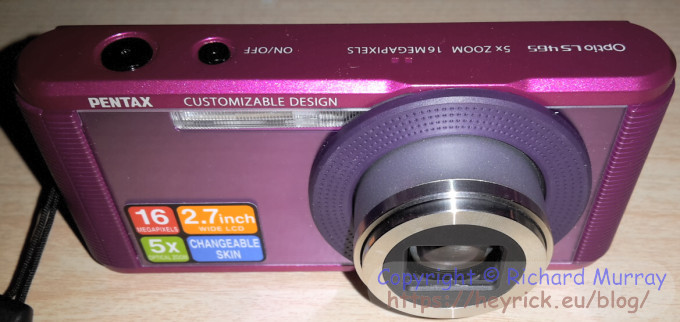
Pentax Optio LS465 digital camera
The retail price of this camera seems to vary between €60 and €90 depending upon where you look. As my camera was a ruby pink model (looks more like magenta satin to me), it found itself on the sale table. I picked it up for just under thirty euros.
The specs - the front of the camera, and the box, proclaim that the camera offers 16 megapixels and has a 2.7 inch wide LCD and a 5× optical zoom and changeable skin.
Let's look at it from a different angle.
The 16 megapixels (actually around 15.9) is a 1/2.3inch CCD sensor. While a quick Google will tell you 1/2.3" is about 11mm, you must remember that this is a diagonal measurement. The actual imager size is 6.17 × 4.55 millimetres. It's the same size as imagers found in midrange smartphones. Squeezing 15,925,248 pixels into something that's probably about half the size of your little fingernail mean that not only are we getting close to the limits of the laws of physics, we will also prone to suffer from noise - this will show up in the higher ISO ratings.
The 2.7" LCD is functional. That's all I can say. It has a resolution low enough (230Kpix) that I can see the pixels (and so will you in the following screenshots!) plus the viewing angles are pretty poor. In order to keep costs down, they have recycled yesterday's tech and it shows. Painfully. For it also tends to make photos look cartoony coloured.
The 5× optical zoom (equivalent to 28-140mm) is good, but the controls lack finesse so you cannot exactly frame a photo how you want, you have to settle for what the camera prefers. It is aided by a digital zoom that can extend the zoom level to up to 36× and while the preview in the viewfinder at maximum zoom looks utterly appalling, the result is actually surprisingly good considering.
The changeable skin is a gimmick really. There are ten little plastic precut and preprinted "cards" that slot into the front of the camera so you can personalise it. If they were going to do that, they should have included a blank one that could be drawn upon. Either way, it seems a big "huh?". Frankly, I would rather have had a video connecting lead instead...
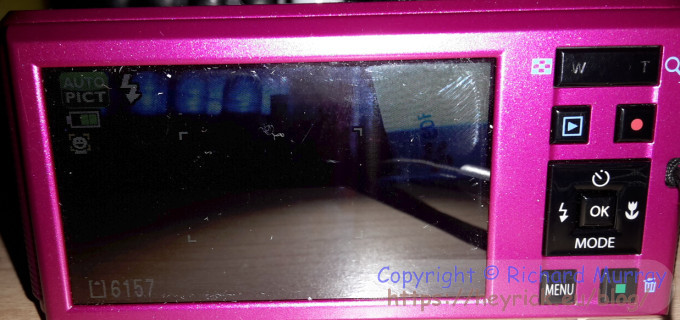
The back of the camera has a pleasing selection of buttons:
At the top, the W and T control the zoom. You can also zoom in (up to 10×) on previews, plus zoom out to display a useful calendar so you can go quickly to a day when a photo was taken.
Below this, the Play button to go to playback mode and look at the photos and videos that have been recorded. The red dot button is for quick access to view recording, so if you happen to see a plane crashing in front of you and you have balls of solid steel and good bladder control, you can start recording video immediately without messing around switching modes and such.
Below this is a four-way control button with an OK button in the middle. These help you navigate the menus, move around pictures (or within a picture) in playback, and in normal photo mode, these are shortcuts to common functions:
The left button is for the flash. Your flash choices are standard - off, auto, on, and on with red eye correction. It is worth mentioning that the camera contains a proper flash bulb and not a really bright LED. This means that flash pictures are generally better than those that you could achieve with mobile phones.
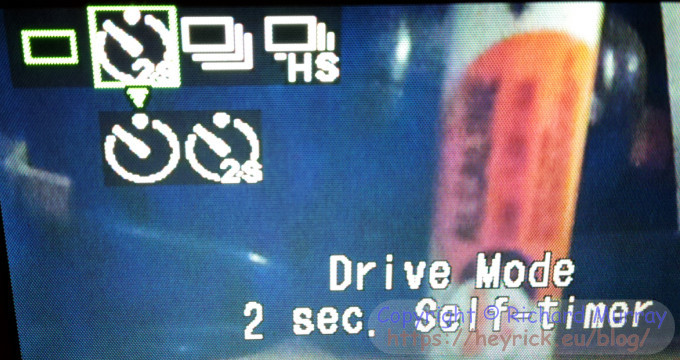
The top is the 'drive' setting:
This offers a self timer of two seconds, ten seconds, continuous shot, and burst shot. With the self timers, you can set a 'beep' to play every second while counting down. One of the sounds is a cat mew. Yup, I have that one. Continuous mode means that as long as the shutter button is depressed, it will keep taking photos (but you'll get no preview) and it will take about one photo per second at your chosen resolution (to a Class 4 SD card). Burst mode forces the resolution to 4 megapixels and then takes pictures at around 2-3 per second, again with no preview.
The right button is for the focus mode:
Your choice is Auto Focus (standard), macro (down to around 15cm), super macro (down to around 5cm), some sort of tracking focus, and a "distance" mode - perhaps this latter one switches to "infinity focus" similar to disposable cameras?
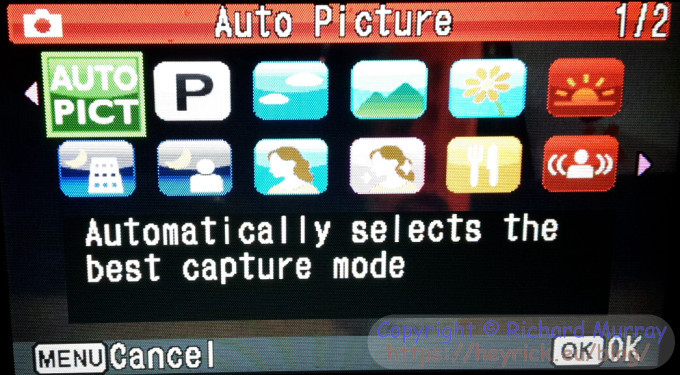
The bottom of the four-way hides a bewildering selection of choices. You normally get a few modes, right? Like daytime, night, sunset, and so on? Check this:
I'll walk you through:
Auto - best for simple point and shoot, and the camera is actually pretty good at picking good options, although the night time white balance can be rather skewed.
Program - all the controls at your disposition. You can set the options exactly as you want, which is great for taking the perfect photo, but a bit too fiddly for using in day-to-day quick photo opportunities. This is like the old style SLR option - it gives the most control, but you need to be an ace to get great photos in a hurry.
Blue sky - emphasises sky saturation to make images look awesome. Not tried this (it is winter) but hopefully it will counteract the tendency for nice skies to appear washed out.
Landscape - enhances sky and plant colours.
Flower - flower outlines are softened for less harsh images of delicate beauty (those are my words, not publicity).
Sunset - for dealing with the special colours that occur at sunset.
Night scene - with a tripod and long exposure, this can make vivid nighttime photos.
Night portrait - perhaps like night scene with higher ISO and shorter exposure, as people don't stay still for so long.
Portrait - for healthy and bright skin tones, or so the little bit of help blurb claims.
Natural skin tone - enhances skin tone while smoothing blemishes, or in other words, not so natural!
Food - for food images, claims to enhance saturation and contrast. I hope it also deals with greeny/yellow snot-like colour casts from fluorescent lighting.
Digital shake reduction - I think this bumps up the ISO (sensitivity) and alters the exposure to compensate. The camera will have shaken less in the shorter time, but images will be 'noisier' as a result.
Kids - for dealing with moving kids. Don't be tempted to use this for active pets because...
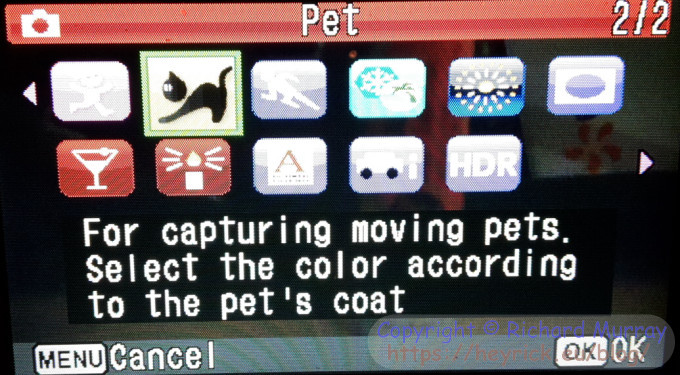
Pet mode! Yup, go to Pet mode and choose if your animal is a white/grey/black dog or a white/grey/black cat (tabbies will be "grey") and the camera will do the rest. How? I don't know, but I think I've only ever managed to take about three non-blurry photos of Wawa in her entire life, so maybe I ought to try this.
Sport mode - claims to also track the subject until the photo is taken.
Surf and snow - alters the metering to cope with bright scenes like a sunny day with snow.
Fireworks - not had an opportunity to try this, but every camera I have owned has been utter crap at dealing with fireworks, so it is interesting to see this as an option here.
Frame composite - pastes a frame on top of a picture. You can download more frames and possibly create your own.
Party - for images in dim light but where things are perhaps a little too illuminated to make night portrait be of use.
Candlelight - for real? This camera thinks it can work in candle light?
Text capture - with adjustable contrast. Might be more useful if the lens didn't distort.
Miniature filter - adds some blurring to a selected place to make a scene look like it is a miniature model.
HDR - fake HDR messes with the contrast to make things look cartoony. How to tell if your HDR is fake? Take an HDR photo while moving. If the image is either sharp or slightly blurry, it is a fake. If the image contains weird artefacts such as a lamp post with one or two ghost lamp posts beside it, then that's real HDR. Proper HDR takes multiple photos with slightly different exposure, and then attempts to blend together the best bits of each, so you can have lush perfectly exposed grass with a bright blue sky. Sort of "how it looks to you" instead of the pale imitation (pun intended!) that is what digital cameras traditionally achieve.
Wow. That's a lot of options.
The bottom left button is the Menu button. This is for entering the setup menus, and "cancelling" changes when in a menu or option.
There are too many options to list here, so I'll just make two observations:
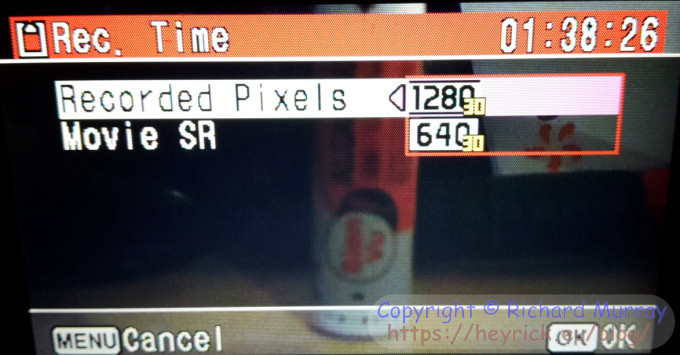
It is odd how the video mode shows 1280 and 640 instead of the typical 720P and 480P. Maybe they wanted to show off bigger numbers?
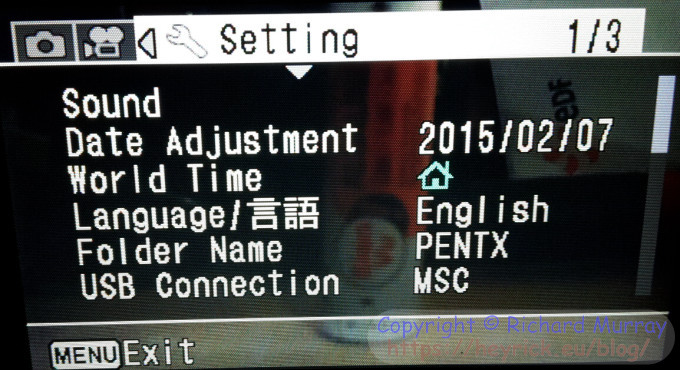
There is an option to configure what the camera will remember from one use to the next: flash mode, drive mode, focus mode, zoom position, white balance, ISO (sensitivity), exposure compensation, digital zoom, face detection, display type, file number. I have the camera remember the file number, flash mode, drive mode, and that digital zoom was enabled. These are the things I'd commonly like preserved from one session to the next. The rest can be forgotten.
This leaves the final option. The "green button". By default, this puts the camera in to a simplified "green mode" where it makes more or less all of the decisions for you. Other choices available are white balance, ISO/sensitivity, or exposure compensation. I have set mine to ISO so switching the sensitivity is a button press away.
Well. There are plenty of options. Now to look at it in use.
The first thing of note is that when zoomed out, there is a degree of barrel distortion (makes things look like they are bulging). This is perhaps an inevitable side effect of having a fairly wide angle lens cram an entire image into something approx. half a centimetre in both dimensions. Perhaps it is worth keeping this in mind so when framing a shot you don't end up with bendy lampposts or wibbly fences. That sort of thing.
The camera isn't overly quick - the time from one shot to the next, or power on to ready is a mite under three seconds. Unfortunately, the charging/flash ready/accessing SD lamp is around the front where you won't be able to see it. Interesting design choice. Speaking of flash, it takes about three seconds on top to charge the flash. You know, like old-fashioned cameras.
One thing you definitely will appreciate is that there is practically no shutter lag. You press the button, the image is taken. I've used some cameras that need "a moment" to think before taking a picture and that is the most annoying thing imaginable.
The camera uses its own (tiny!) rechargeable battery. This is rated at 200 shots, and I can believe this is well within reach - however if you are on holiday you'll need to remember to charge it as you can't insert fresh AA cells if you need more power. That said, I feel as if I can take a million photos more than by previous Agfa (7mpix) camera that would chew through double-As as if they were going out of fashion. If you have money/resources, you could consider buying a spare battery - it is easy to change, it slots in beside the SD card. Original batteries cost about €45 from Amazon, Chinese knock-offs cost a tenner. Make sure your battery is 720mAh. That said, if you have more money you'd probably have bought a bridge or maybe even a DSLR...
The camera is small. Being small, friendly, colourful, and fairly easy to use, this is probably aimed at girls more than anything else (the pink magenta colour being a big hint); and as such it tries to cram a lot into a small space. Maybe a little too large for a pocket, but small enough to fit into a handbag. The lens has a barn door style cover that closes when the lens is parked in the inactive position. Weighing about 105g, it feels hefty and solid in the hand (despite looking a bit plasticky), however it isn't an unreasonable weight, less than most smartphones.
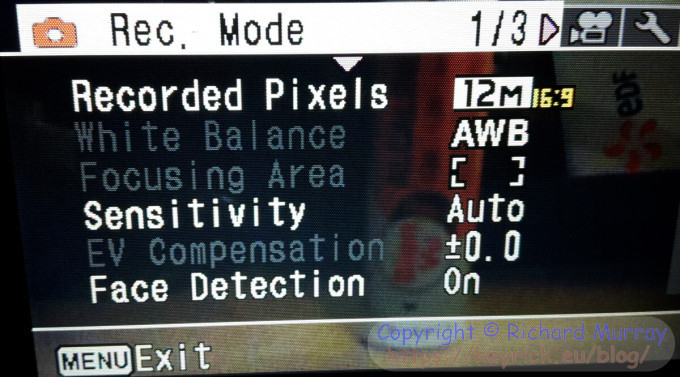
I prefer my photos in the 16:9 widescreen mode. In this mode, the images are 4608×2592 (11,943,936 pixels; ~12 megapixels). It does this by simply throwing away the top and bottom of the image to make a 16:9 aspect image. I just prefer the dimensions, though getting them "developed" in a photo booth is a compromise as everybody just assumes you want it on 15×10 paper (which doesn't even match the regular 4:3 aspect either, duh).
The camera shutter speed ranges from 1/1200th of a second to 4 seconds. You cannot directly control this (that I can see), the camera determines the best shutter speed from all of the other settings. For the long shutter, you'll want to be in night mode.
The camera has no guide light to aid nighttime focusing. It will usually revert to an "everything should be in focus" position, but this works best with scenes.
Night mode needs a tripod or to put the camera on something, and preferably to use the 2 second timer too so there is no button press shake.
You can choose an ISO setting (translates to "sensitivity"). Auto is the best choice. Others are from ISO 64 to 6400. Images are clear and good at ISO 64. Ratings 100, 200, and 400 are good for general purpose day to day photography. Over 400 and you'll start seeing noise. Actually, it is there from ISO 200 but much harder to see. At ISO 3200 and 6400, the camera will limit your image size to 5 megapixels, but these images are really noisy, with ISO 6400 looking - frankly - quite horrible. The best option is to leave this on auto unless you need a specific level of sensitivity. I took a picture of Orion (night scene, long exposure) and on auto it looked good, with the stars in their correct places. With ISO 6400, the night sky was a mottled bluey-grey. You can tell people that the long exposure has managed to capture stars too faint to be seen by the naked eye. You'd be lying, of course, but it is better than saying "my camera sucks", don't you think? Just pretend ISO 6400 doesn't exist. The camera is quite capable of good night shots without bothering with the ISO options.
The camera manages 720P video but the microphone isn't up to much, I don't think. I haven't really used the video mode much, the mobile phone does this sort of thing better.
You can apply some basic filters (Sepia, Mono, etc) and crop photos directly on the camera after taking photos. You can resize, tweak red eyes, and muck around with the photo in various other ways. While the options are fairly limited, it may be enough to tweak a photo for best results prior to getting prints made without all the rigmarole of using image editing software on a computer.
Squeezing a 12 megapixel image into approximately 2MiB per photo, you can imagine that when you look at details, there will be artefacts of JPEG compression. Unfortunately the camera has no "quality" option, so it is something that you'll have to live with. It isn't helped by some aggressive sharpening, perhaps to try to counteract "issues" of using such a tiny sensor with so many pixels on it.
That said, for the majority of uses (both on-screen and printed) these will only really be noticeable if you go looking.
I am not sure how I would feel if I paid list price for this camera. I think that there are better models that only cost a little bit more. However the price I paid was a real bargain - and one thing is for certain: A phone attempts to be a "jack of all trades" and while a phone can capture some good photos, this camera is designed specifically to take photographs and it's a job it does well; offering an optical zoom (which already puts its capabilities far beyond that of a phone) as well as coping admirably with "difficult" conditions.
Some photos. You'll see.
I think this is the first photo I took. I was playing with the macro settings.
Yeah, the built-in frames really are this cheesy. I guess this one would be great for a mother to take photos of her daughter doing interesting stuff at school...
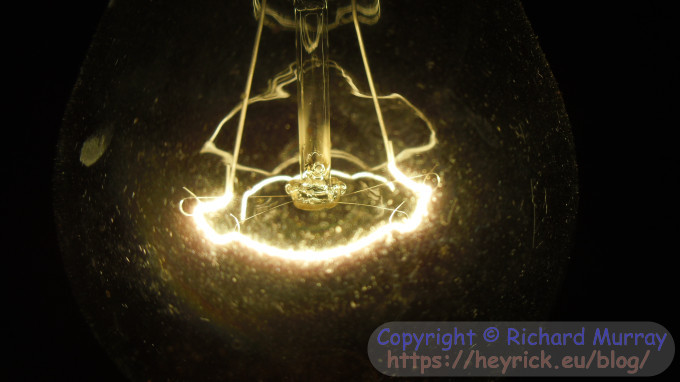
It deals effortlessly with super macro on a lightbulb, things that flummox lesser cameras.
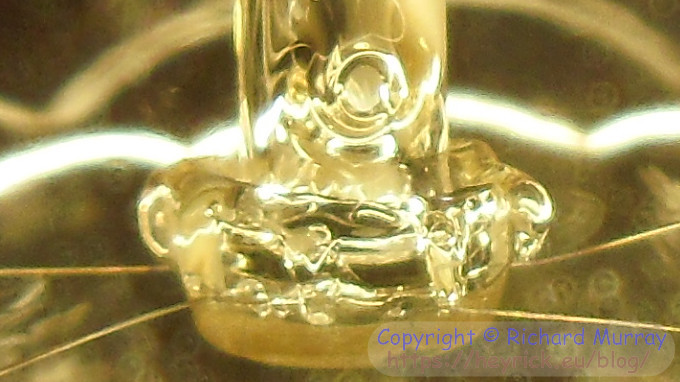
And as you can see from this real-size portion of the above picture, it has absolutely nailed the focus on the central glass pillar and set the colour balance to produce a photo that actually manages to make a generic tungsten light bulb look ... beautiful.
(you can see the artefacts - look at the wire supports or around the glowing filament)
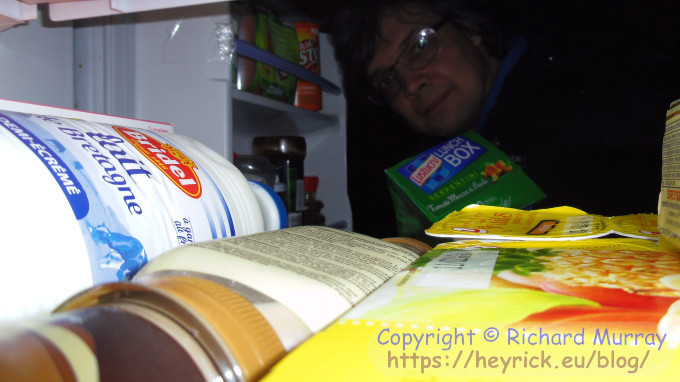
The camera's small size and self timer lend it to some unusual shots. This is from the back of the fridge!
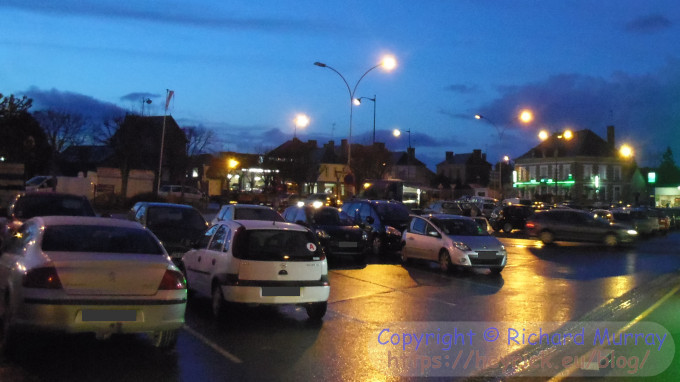
In a nearby(ish) town a little after sunset, taken with me holding the camera and leaning against a wall. Sublime reflections on the car park. I like the colour reproduction here. The green cast on the right is from a pharmacy - in France these are always lit in vivid green neon. The bar and the pharmacy are the two places with the most ambitious exterior lighting. I wonder if this says something about the French?
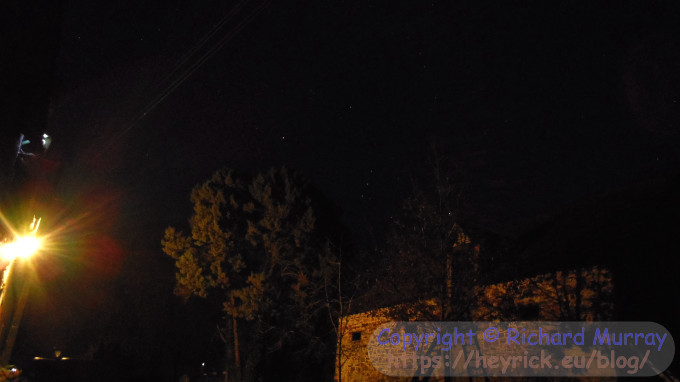
A long exposure from ground level towards one of the outbuildings. That's Orion in the background. It looks better in the full sized image, scaling down has aliased away some of the stars.
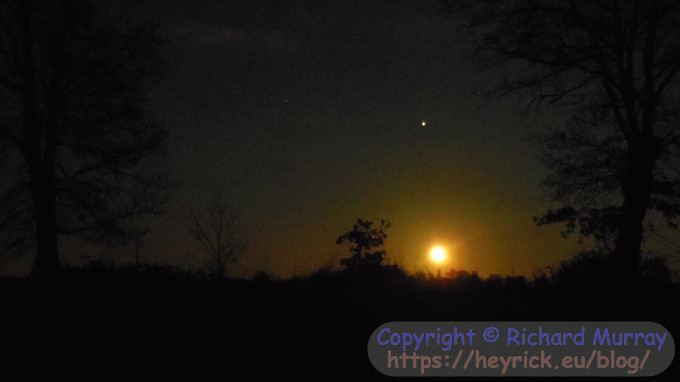
The rise of a full moon. I think that's Jupiter behind, as well. My phone, by contrast, got a white dot surrounded by black.
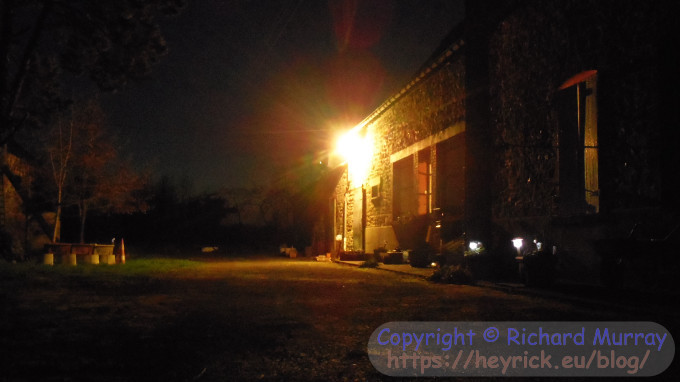
Long exposure (night scene mode) looking down the front. It is night, there is some moonlight and the bulb is a 100W (or was it 75W?) tungsten bulb. That's it. The camera has absolutely outdone itself and delivered a lovely photograph with rich colours. The only processing that I have done is to straighten the image, as the camera was perched on a rock and not quite even. Everything else - the exposure, the colour reproduction, the everything, was down to the camera making its own decisions here. It did a great job.
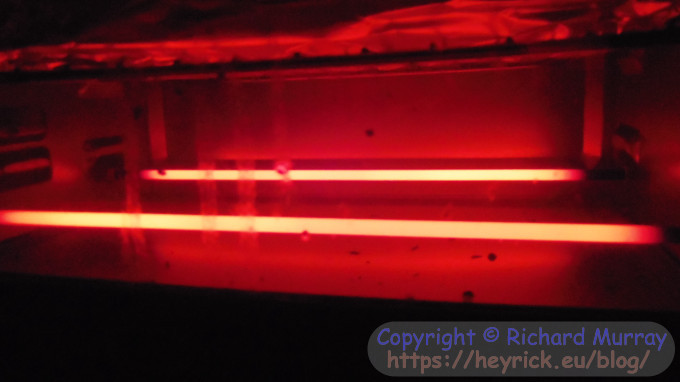
And finally, I was making a pizza with a small electric oven (quick to heat up) and I saw the elements were glowing dimly. So I thought, I wonder...
Now I know.
Effortless.
This was hand-held too.
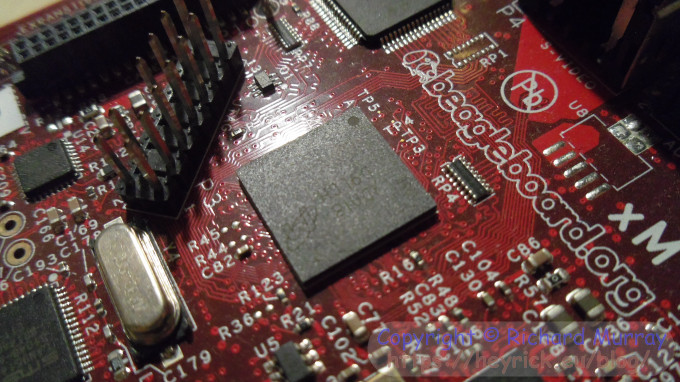
You have already seen some photos taken with this camera, only I didn't mention it at the time. The photos of my new phone, the "mobile office", the water tower...
Your comments:
Please note that while I check this page every so often, I am not able to control what users write; therefore I disclaim all liability for unpleasant and/or infringing and/or defamatory material. Undesired content will be removed as soon as it is noticed. By leaving a comment, you agree not to post material that is illegal or in bad taste, and you should be aware that the time and your IP address are both recorded, should it be necessary to find out who you are. Oh, and don't bother trying to inline HTML. I'm not that stupid! ☺ ADDING COMMENTS DOES NOT WORK IF READING TRANSLATED VERSIONS.
You can now follow comment additions with the comment RSS feed. This is distinct from the b.log RSS feed, so you can subscribe to one or both as you wish.
This web page is licenced for your personal, private, non-commercial use only. No automated processing by advertising systems is permitted.
RIPA notice: No consent is given for interception of page transmission.