Rick's b.log - entry 2014/04/26 |
| ||||||
mailto: blog -at- heyrick -dot- eu
You are not reading my b.log using HTTPS. You can switch to HTTPS by clicking here. Geekfest! An OLED on the Pi! (part 2)Now that the hardware is in place, it is time to make use of it.The first step is to download the OLED module. Within the archive, you will find the module, plus various small test programs, and the demo program that you saw the video of in the last b.log entry.
Double-click on the OLED module. Nothing will appear on the display, though it will be configured and made active. If nothing appears to happen, that is good. 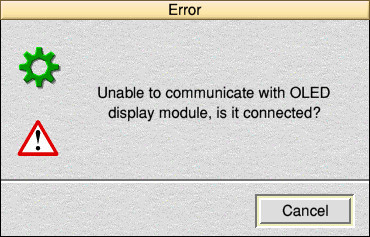
IntroductionThe OLED module provides you with a simple way to make use of an attached OLED display. How you manage this depends upon your requirements and the level of complexity you wish to attain. SWIs are provided for writing text (which will appear in the RISC OS "system" (VDU) font), basic graphics (line, rectangle, circle, triangle), plus the ability to transfer sprites to the display if you have pre-made images, or if there is something that is more complex than that which can be realistically 'drawn'.
Text plottingThe display module text area is 16×8. This is 16 characters across the display and 8 rows down. This provides a total of 128 characters.The home position is 1,1, the upper left.
 To change how the text appears, simply change the VDU font. The command *FX 25,0 will restore the default font.
When plotting text, most control codes are suppressed. Some have a special purpose:
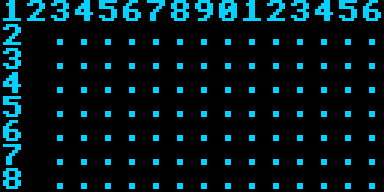
Graphics plottingThe display offers 128 pixels horizontally by 64 pixels vertically. The home position is0,0, the lower left.
 Commands are provided to draw lines, (filled) rectangles, (filled) circles, and filled triangles. There is also the possibility to create your own sprites and use these instead of drawing into the display memory.
Display refreshingWhenever you output something to the display, it will schedule a refresh in 5 centiseconds. This is to permit a number of text/graphics drawing commands to be performed without causing flicker or long delays due to repeated data transfer.Once the 5cs delay expires, the cached display data will be sent to the OLED's GDRAM. Any subsequent output to the display will cause another refresh to be scheduled, and so on. If the absolute maximum attainable speed is required (for animation or the like), you can call OLED_ForceRefresh which will remove the scheduled refresh and will instead do it immediately.
Module configurationIn the configuration that I am using, the OLED is actually mounted upside down. As you can see from the photo, this is to permit the connector to pass neatly through the slot in the Pi's casing so that it can lie flush with the casing. OLED$Orientation variable:
I say "force" in italics because the
The default contrast (brightness) of the OLED is nominally 50% (though in actuality there is more difference between dimmest and 50% than 50% and brightest). If you wish to select a different level of contrast, you will need to set the Here is a rough demonstration of different contrast levels using a camera with exposure locked: 
The configuration is read as the module initialises, and every time
Getting going Step one is to load the module if it is not already present. The usual way would be: Step one is to load the module if it is not already present. The usual way would be:
In your program, you should call Here is a simple program to demonstrate: SYS "OLED_Initialise" SYS "OLED_CLS" SYS "OLED_Print", "Hello!"
A simple applicationHere is the source code for a simple (single-tasking) clock using the OLED.SYS "OLED_Initialise" SYS "OLED_CLS" invert$ = CHR$(19) normal$ = CHR$(20) crlf$ = CHR$(13)+CHR$(10) curpos$ = CHR$(31) SYS "OLED_Print", invert$+" RISC OS clock "+normal$+crlf$+crlf$ SYS "OLED_Print", "The time now is:"+crlf$+crlf$ SYS "OLED_Print", " "+RIGHT$(TIME$, 8)+crlf$+crlf$ SYS "OLED_Print", LEFT$(TIME$, 4)+" "+MID$(TIME$, 5, 11) REPEAT t% = TIME REPEAT : UNTIL ((TIME - t%) > 100) : REM wait a second SYS "OLED_Print", curpos$+CHR$(5)+CHR$(5)+RIGHT$(TIME$, 8) UNTIL FALSE : REM Cursor to col 5 row 5 
Documentation?Look at the documentation supplied with the module; also look at the source of the demo program.
Over to you!Show me what you can do. Place links in the comments below...
Your comments:Please note that while I check this page every so often, I am not able to control what users write; therefore I disclaim all liability for unpleasant and/or infringing and/or defamatory material. Undesired content will be removed as soon as it is noticed. By leaving a comment, you agree not to post material that is illegal or in bad taste, and you should be aware that the time and your IP address are both recorded, should it be necessary to find out who you are. Oh, and don't bother trying to inline HTML. I'm not that stupid! ☺ ADDING COMMENTS DOES NOT WORK IF READING TRANSLATED VERSIONS.
  
(Felicity? Marte? Find out!)
📺 The SIBA stories 📹
It's a simple substring match.
Last read at 00:13 on 2024/04/25.


| ||||||||||||||||||||||||||||||||
| Next entry - 2014/05/01 Return to top of page |
| © 2014 Rick Murray |
| Retrieved from http://www.heyrick.co.uk/blog/index.php?diary=20140426 on 25th April 2024 |